Update I’ve got a simpler build phase thanks to YAML build definitions
Thanks to a bit of prompting on Twitter, I’ve whipped up a very basic “Hello World” Rust example with a Windows (MSVC) and Linux build.
Before We Start
Requirements:
Mandatory:
- A Microsoft account (like a Hotmail, Live, or Outlook.com account) OR an Azure AD account
- A VSTS account (How to create a VSTS account)
Optional:
- A GitHub account
Setting up your Workstation for Working with Rust
If you don’t have a Rust development environment already, check out my post on setting up a Windows development environment for Rust.
Getting Started
Creating the Source Repository
We’ll need somewhere for VSTS to get the source of our project. In this example, I’m going to use GitHub (my project can be found here). In the code samples below, I’ll use this project and I’ve noted the starting and ending tags for each section.
Note: I’m using a Windows workstation from a PowerShell prompt.
As long as you have an internet accessible Git repository, you can use whatever repository source you’d like, or VSTS offers free private Git repositories for small teams.
Initializing the Project
Starting tag - first
After creating an new repository in GitHub (or in VSTS), clone the new repository down to your local workstation to a location where you’d normally work with source code.
git clone https://github.com/smurawski/vsts_rust_build.git
Then, change directories into the new project.
cd ./vsts_rust_build
Now, we can create the initial “Hello, World!” Rust example.
cargo init --bin --name hello_world
This will scaffold out a simple Rust binary that will print “Hello, World!”.
Then, we’ll commit these changes and push them to our central repository.
git add .
git commit -m 'Cargo init'
git push origin master
Ending tag - second
Creating the Windows Build
Windows Build Script
Starting tag - second
Now that we have our basic application, we’ll add a little wrapper PowerShell build script (so that it is easier to add behavior to our build without having to put too much in the UI).
We’ll add build.ps1 to our project.
invoke-restmethod https://raw.githubusercontent.com/smurawski/vsts_rust_build/master/build.ps1 -outfile build.ps1
git add build.ps1
git commit -m 'windows build script'
git push origin master
Ending tag - third
Linux Build Scripts
Starting tag - third
Because I’m not as clever with Bash as I am PowerShell, I have a few quick shell scripts to help the linux build along, rather than one big one.
invoke-restmethod https://raw.githubusercontent.com/smurawski/vsts_rust_build/master/install.sh -outfile install.sh
invoke-restmethod https://raw.githubusercontent.com/smurawski/vsts_rust_build/master/format.sh -outfile format.sh
invoke-restmethod https://raw.githubusercontent.com/smurawski/vsts_rust_build/master/test.sh -outfile test.sh
invoke-restmethod https://raw.githubusercontent.com/smurawski/vsts_rust_build/master/build.sh -outfile build.sh
git add install.sh
git add format.sh
git add test.sh
git add build.sh
git commit -m 'linux build scripts'
git push origin master
Ending tag - fourth
Adding the Windows Build To VSTS
My VSTS account is smurawski, so I’ll start at my account landing page. I’ll create a new project called vsts_rust_hello_world (more documentation on how to create a team project).
Once I have my project, I’ll need to create a build definition from the “Builds” page (my url for that will be at https://smurawski.visualstudio.com/vsts_rust_hello_world/vsts_rust_hello_world%20Team/_build).
Rather than clicking through and adding a bunch of tasks, I’ve exported the build definitions I’ve created for this example. We can download them and import them from the Builds screen.
invoke-restmethod https://raw.githubusercontent.com/smurawski/vsts_rust_build/master/build_definitions/vsts_rust_hello_world-windows-CI.json -outfile vsts_rust_hello_world-windows-CI.json
invoke-restmethod https://raw.githubusercontent.com/smurawski/vsts_rust_build/master/build_definitions/vsts_rust_hello_world-linux-CI.json -outfile vsts_rust_hello_world-linux-CI.json
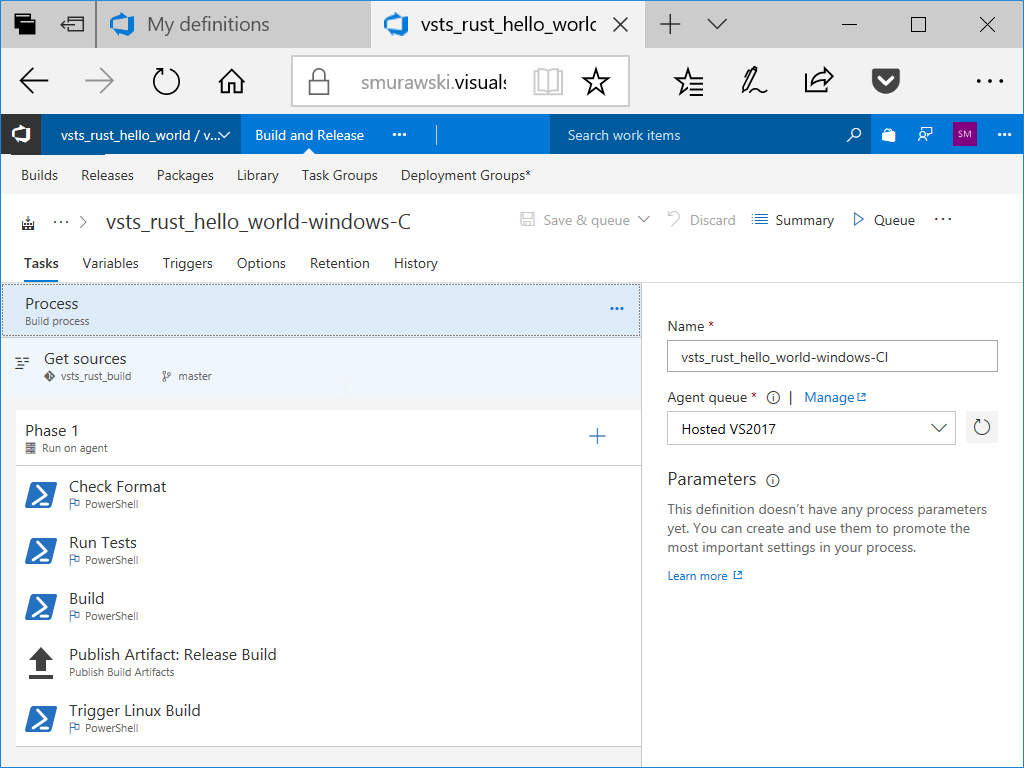
Windows Build Definition
On that page, I’ll select import and upload vsts_rust_hello_world-windows-CI.json. We’ll have to update the Get sources step to pull from our repository (about repositories).
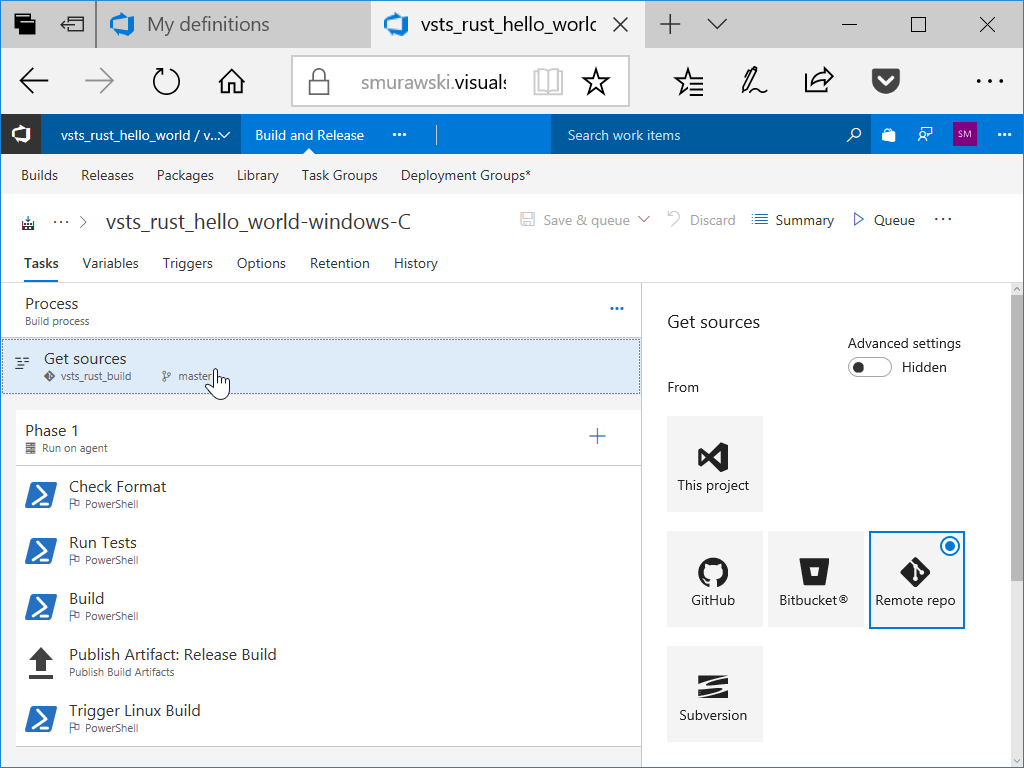
Windows Get Sources
We’ll also need to update the build trigger. When building from GitHub, I normally trigger builds on changes to master.
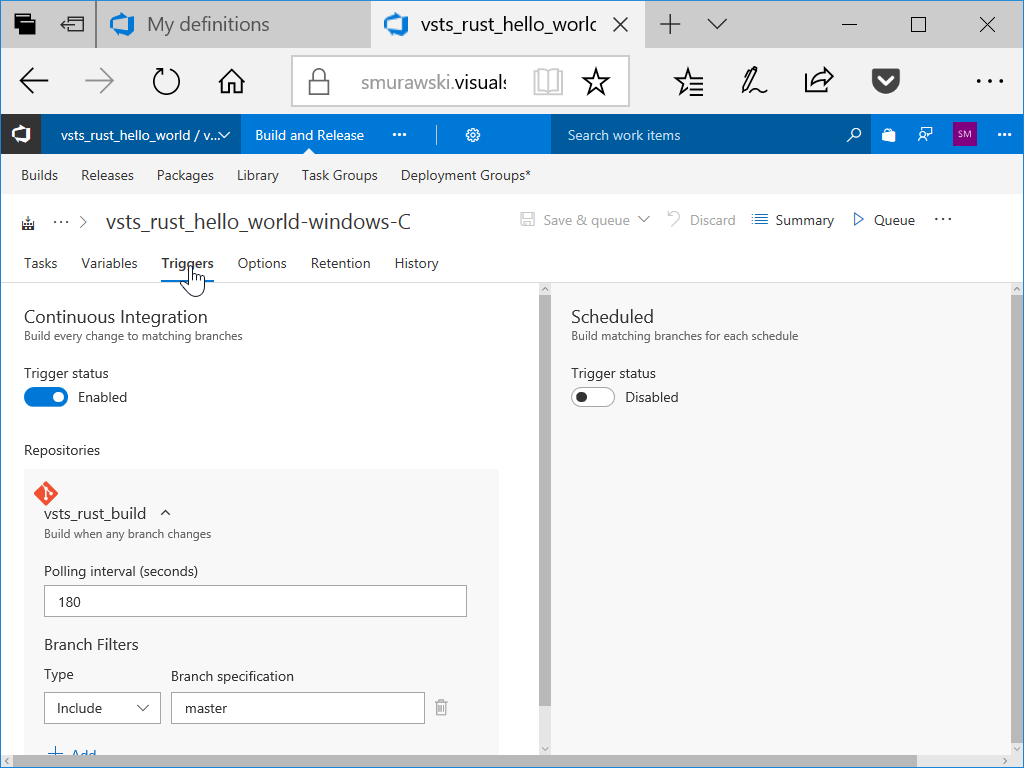
Windows Build Trigger
After we’ve updated these things, we can save the build definition.
Adding the Linux Build to VSTS
Next, we can import the linux build definition. Back on the “Builds” page, we can import vsts_rust_hello_world-linux-CI.json.
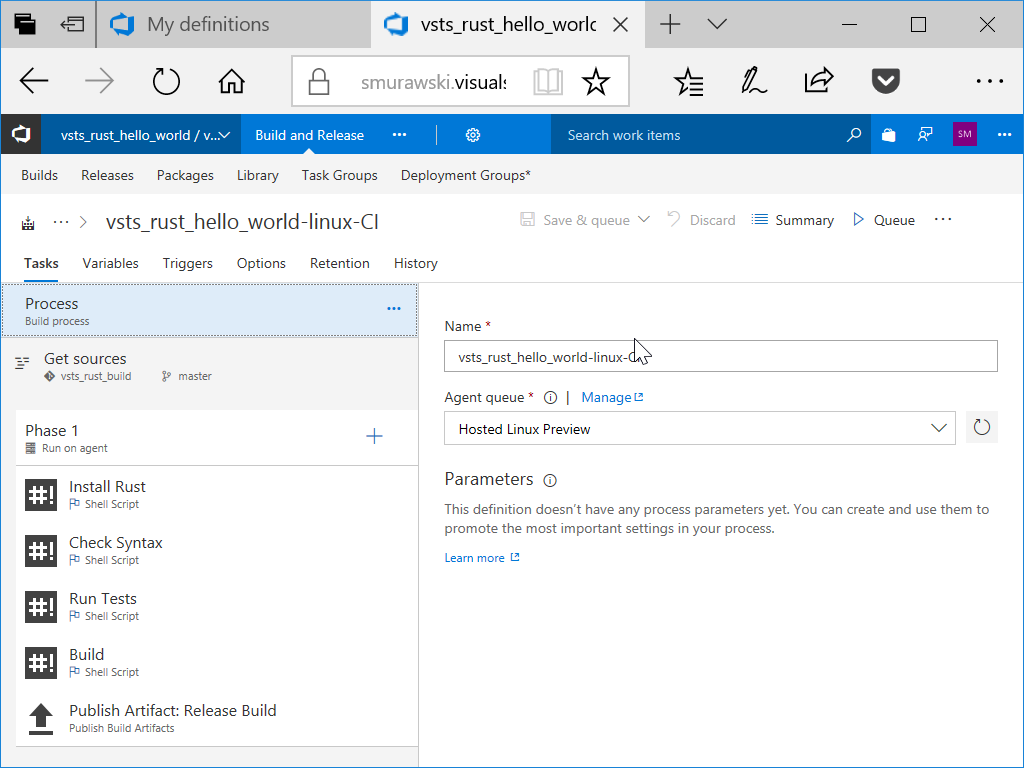
Linux Build Definition
We’ll have to fix the Get sources for this build as we did in the Windows build.
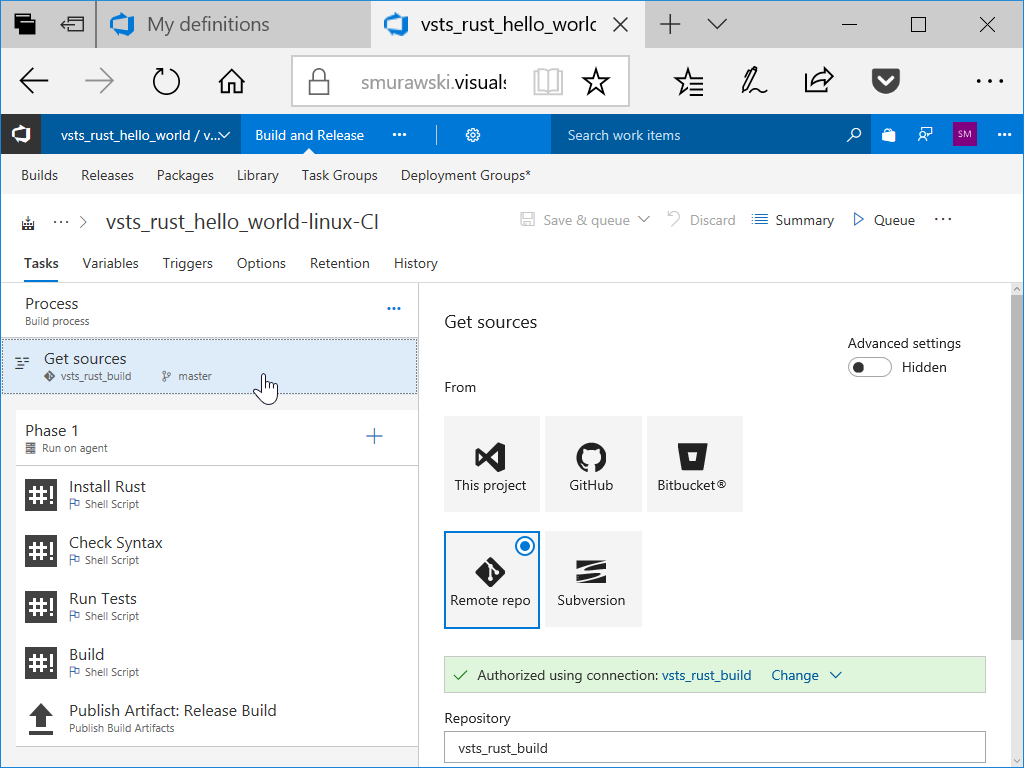
Linux Get Sources
After we save this build definition, we’ll need to get the “Build Definition ID”. I couldn’t figure out how to trigger multiple builds using different build queues directly in VSTS (maybe someone more knowledgeable than I can help out..), so we have a step in the Windows build to use the REST API to kick off the Linux build after the Windows build. This step requires us to supply the “Build Definition ID” for the Linux build to the Windows build.
You can find the “Build Definition ID” in the URL for the build definition after it has been saved. In my case, with https://smurawski.visualstudio.com/vsts_rust_hello_world/vsts_rust_hello_world%20Team/_build/index?context=mine&path=%5C&definitionId=51&_a=completed that is 51.
Once we’ve got the ID number, we can edit our Windows build definition and update the LINUXBUILD_DEFINITIONID variable in the “Variables” tab of the edit Build screen.
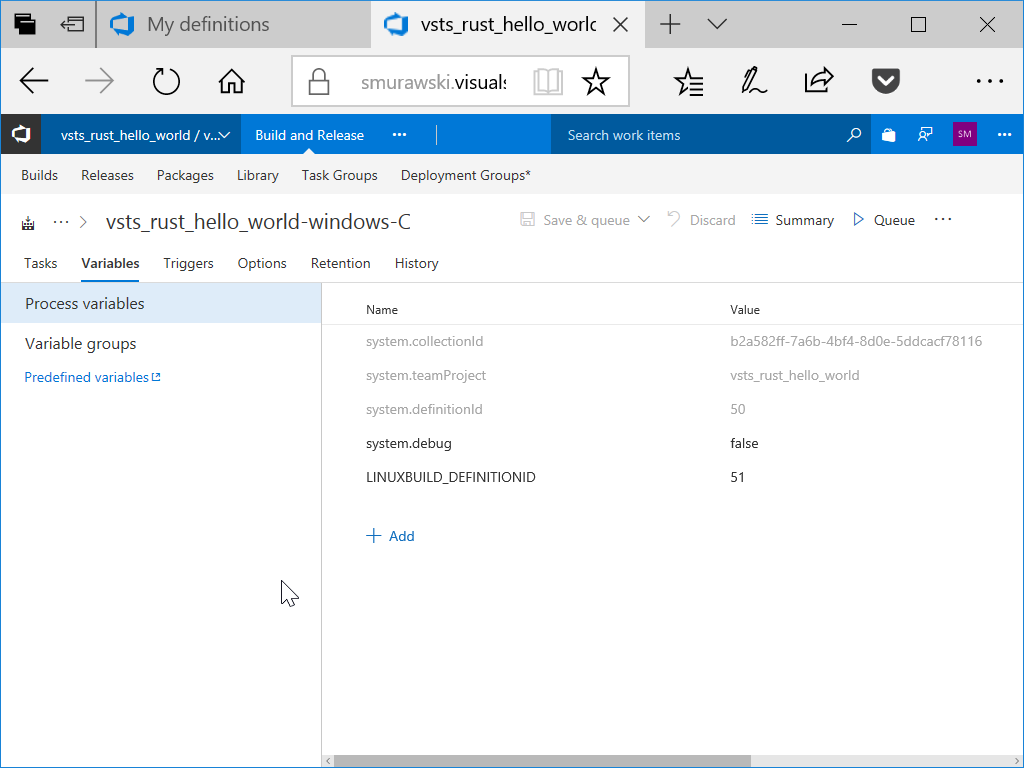
Linux Build ID
Starting The Build
Starting tag - fourth
Now that we have our build in place, we can start to make changes to the code and have our CI process validate those changes.
We’ll start by adding a failing test to our “Hello, world!” application.
Add to src/main.rs
#[cfg(test)]
mod tests {
    #[test]
    fn it_works() {
        assert!(false);
    }
}
After we add that to the src/main.rs file, we can test that it breaks our build.
git add src/main.rs
git commit -m 'Add a broken test`
git push origin master
To fix the test, we an just change it to
#[cfg(test)]
mod tests {
    #[test]
    fn it_works() {
        assert!(true);
    }
}
And add it back to the repo and push to master.
git add src/main.rs
git commit -m 'Fix the broken test`
git push origin master
Ending tag - fifth
Next Steps
Feel free to take these build definitions and build scripts and make them your own. If you’ve got a suggestion for making these examples better, I’d love a PR or two.